I used my Promethean board to trace all of the converging lines to the vanishing point, which is just above Jesus's head. I think Da Vinci purposely made a striped carpet and checkered ceiling to add more converging lines!
The students were very excited to see this! For those of you who also teach K-6, you know how 6th grader's attitudes are, so I was very happy to be able to impress them.
Next, we looked at some photographs with converging lines on them. We looked at a picture of some railroad tracks, and an aerial view of a city. This time, I let the students find the converging lines. We traced them until we got to the vanishing point. In the city photograph, the vanishing point was off the edge of the page.
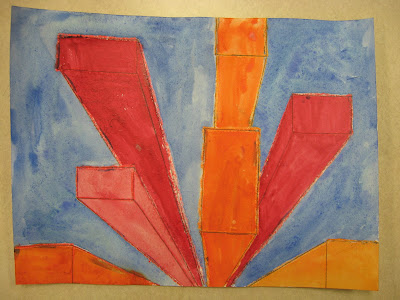
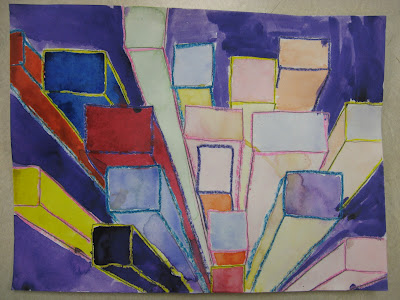
Next, the students made their own perspective pictures of an aerial view of a city. I let the students choose if they wanted to make a realistic city, with details such as windows on the buildings, or if they wanted to make an abstract city that was basically colored 3-D boxes. If the students wanted their vanishing point to be off of the edge of the page, we attached a Post-It note to the edge of the paper, and drew the dot on that. The students used crayons for small details and lines, and painted large areas with watercolors. Here are some student examples:


These look pretty cool. I never had a Prometheus board, but I like the way you were able to use it to teach this. I wanted to share with you a lesson my 4th graders did last year, also of buildings from above in1point perspective. The link to it is here: http://plbrown.blogspot.com/2012/03/looking-down-from-above.html
ReplyDeleteIt was really successful, so it is one I would definitely repeat.
Ooh. I don't know why comment above formatted so strangely...
ReplyDeleteThanks for sharing that, Phyl! I really like how you added the planet earth on yours. Very neat! I appreciate you sharing that with me, because I like to do different projects each year (or else I'll have nothing new to post on my blog!), so I might do something similar next year :).
ReplyDeleteA great project for teaching one point perspective. I really like your introduction, it's detail like this that really 'fleshes out' a lesson plan, so thank you for sharing it. :)Elizabeth
ReplyDeleteVery cool! I especially like the last student's work with the buildings that aren't parallel and perpendicular to each other.
ReplyDeleteGreat use of technology to teach about perspective! I do a similar thing by projecting pictures up onto my whiteboard and then having the students come up one by one and draw the leading lines, label the different grounds, and also explain visual composition. :)
ReplyDeleteAndrea, that is a neat way to make your own low-tech Promethean board (or Smart board)! I think perspective is so fun to teach :).
Delete