Wednesday, December 18, 2013

1st Grade Tigers

During my color unit with 1st grade, I do a painting with each of the secondary colors. This year, I did tigers for orange. In the past, I've done pumpkins for a fall painting; but I switched it up this year, and was really delighted with the results!

The first day of painting tigers, the students mixed the red and yellow paint. Then, I guided them through the basic shape of a tiger; they had very few choices, besides the size of the tiger, its location on the page, and how its tail was positioned. 

The following week, the students got a plethora of choices; I first showed them how to draw a tiger's face, and then demonstrated how the stripes could look (sometimes the tip of the tail is black; sometimes not. Often tigers have no stripes on their stomach. Some tigers have skinny stripes, and others have stripes shaped like a long, skinny triangle).

Then, the students chose where their tiger would be. In the forest, in the mountains, in a circus? Endless possibilities!


Wednesday, December 11, 2013

Primary and Secondary Colors with Kindergarten

I love teaching about color theory. In kindergarten, my students recently learned about primary and secondary colors. We began my making a gumball machine, based on Wayne Thiebaud's painting Three Machines. The students traced a paint tray for the top part with pencil; then they traced over the pencil circle with a black crayon, and drew the bottom part of the machine with black crayon. I gave them a choice on their gumballs' price. Then, with watercolor sets, the students painted. I gave them 8-color Prang watercolor sets to assess if they could find the primaries. Most of the students really understood well, and used only the primary colors as I instructed.


Then, the students learned about the secondary colors. I showed Henri Matisse's The Purple Robe, and selected students to come up front and point to secondary colors they could find in the painting. Then, the students painted a flower vase, loosely based on the vase in the painting. The students mixed one color each day; first orange, then green, and lastly purple. Each day one part of the painting was completed, using this example as a guideline:


Here are a few of the students' finished pieces:


Throughout this unit, I used colored stars for assessments. I punches them with a die cut, painted them, had them laminated, and attached magnets to the back. Then, I would give each student in a row (my tables are in the three rows) a star, and they would go put it on the blackboard, either on the side labeled "primary" or the side labeled "secondary". Then, the next row would get a turn, etc. Due to a small kindergarten class this year, I have only 6 students per row in most classes. It works out perfectly!

Up next in my color unit is the importance of color, with Audubon cardinals. But, I'm not going to post pictures of this year's cardinals because I did last year, and you can see them here.

Tuesday, December 10, 2013

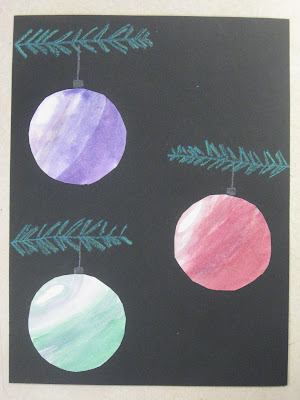
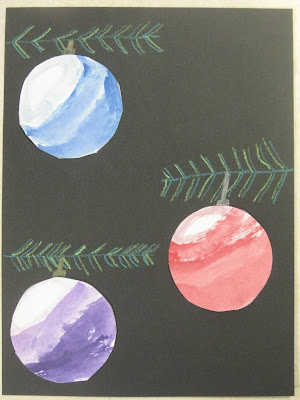
3rd Grade Watercolor Christmas Ornaments with Value

My 3rd grade students learned to show different values with watercolors, by varying the amount of water with their paint. The lesson went extremely well!

The first day, the students traced yogurt cups to make several circles on their paper. I told them to make at least four, in case they messed up on one.

Then, the students painted a pale oval on one edge of a circle, without filling it in. A medium hue was used in the middle of the ornaments, and a dark value was used in a crescent-moon shape on the other end. The students tested their values out on the edge of the paper; it takes practice to get just the right shade!
The second day, the students cut out their three best ornaments, and glued them on a black paper. They used construction paper crayons for the evergreen branches, and metallic crayons for the ornaments' hanging mechanism.

It was a very successful lesson; I think all of them turned out beautifully! The photos are a bit washed out, though, and don't show the vivid colors very well.


Wednesday, November 20, 2013

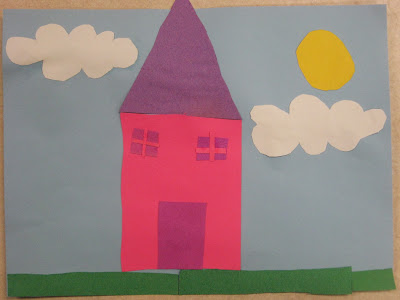
2nd Grade Shape Collages

For the past two years, I have begun my 2nd grade students with a unit on line, and then shape. For the shape unit, one project is a collage of cut paper, in which the students learn the difference between free-form shapes and geometric shapes. They are required to use at least on of each in their collage.

This year, I had to postpone those two units in order to create art for Art To Remember, the fundraiser we did at the beginning of this school year. (The fundraiser went fantastically by the way; the parents loved the products, and we raised over $2,000 for art supplies!) So, I ended up doing shape collages with 2nd grade in the middle of November.

Well, those two months really made a difference; the students' collages turned out beautifully! Their art skills really are at a higher level now, than the previous classes were when they did this same assignment much earlier in the school year.

Here are some photos, followed by part of my bulletin board. I put every student's collage up, and they didn't all fit in the photo.


Monday, November 11, 2013

3rd Grade Leaf Dishes


My 3rd grade students made leaf dishes out of clay this year. I collected an assortment of oak leaves and maple leaves before the students arrived. I tried collecting them the night before, but they dried out! So, I spent each morning gather leaves at my house, and then lunch getting some from the playground. Then, I let each student pick a leaf that they liked.

Next, the students rolled slabs of clay. They roll on a plastic bag so it wouldn't stick to the table. The rolling sticks I use are wooden dowels from Lowe's, 1 1/2" diameter, cut to 12" each. The students have to roll in many directions (diagonally, horizontally, etc.) and on both sides (they pick the slab up, peal it off the bag, and flip it over).

Once the students have a nice slab, they put their leaf on top of it, with the bright shiny side up (so the side where the veins stick out farther is down). Then, they gently roll the leaf into the clay.

Next, the students use a needle tool to carefully cut all around the leaf. Then, a long piece of paper towel is twisted, and the students pick up each edge of the leaf and push some paper towel under it. This holds the edges up, to make the leaf into a nice dish. I think they're just the right size to be a soap dish!