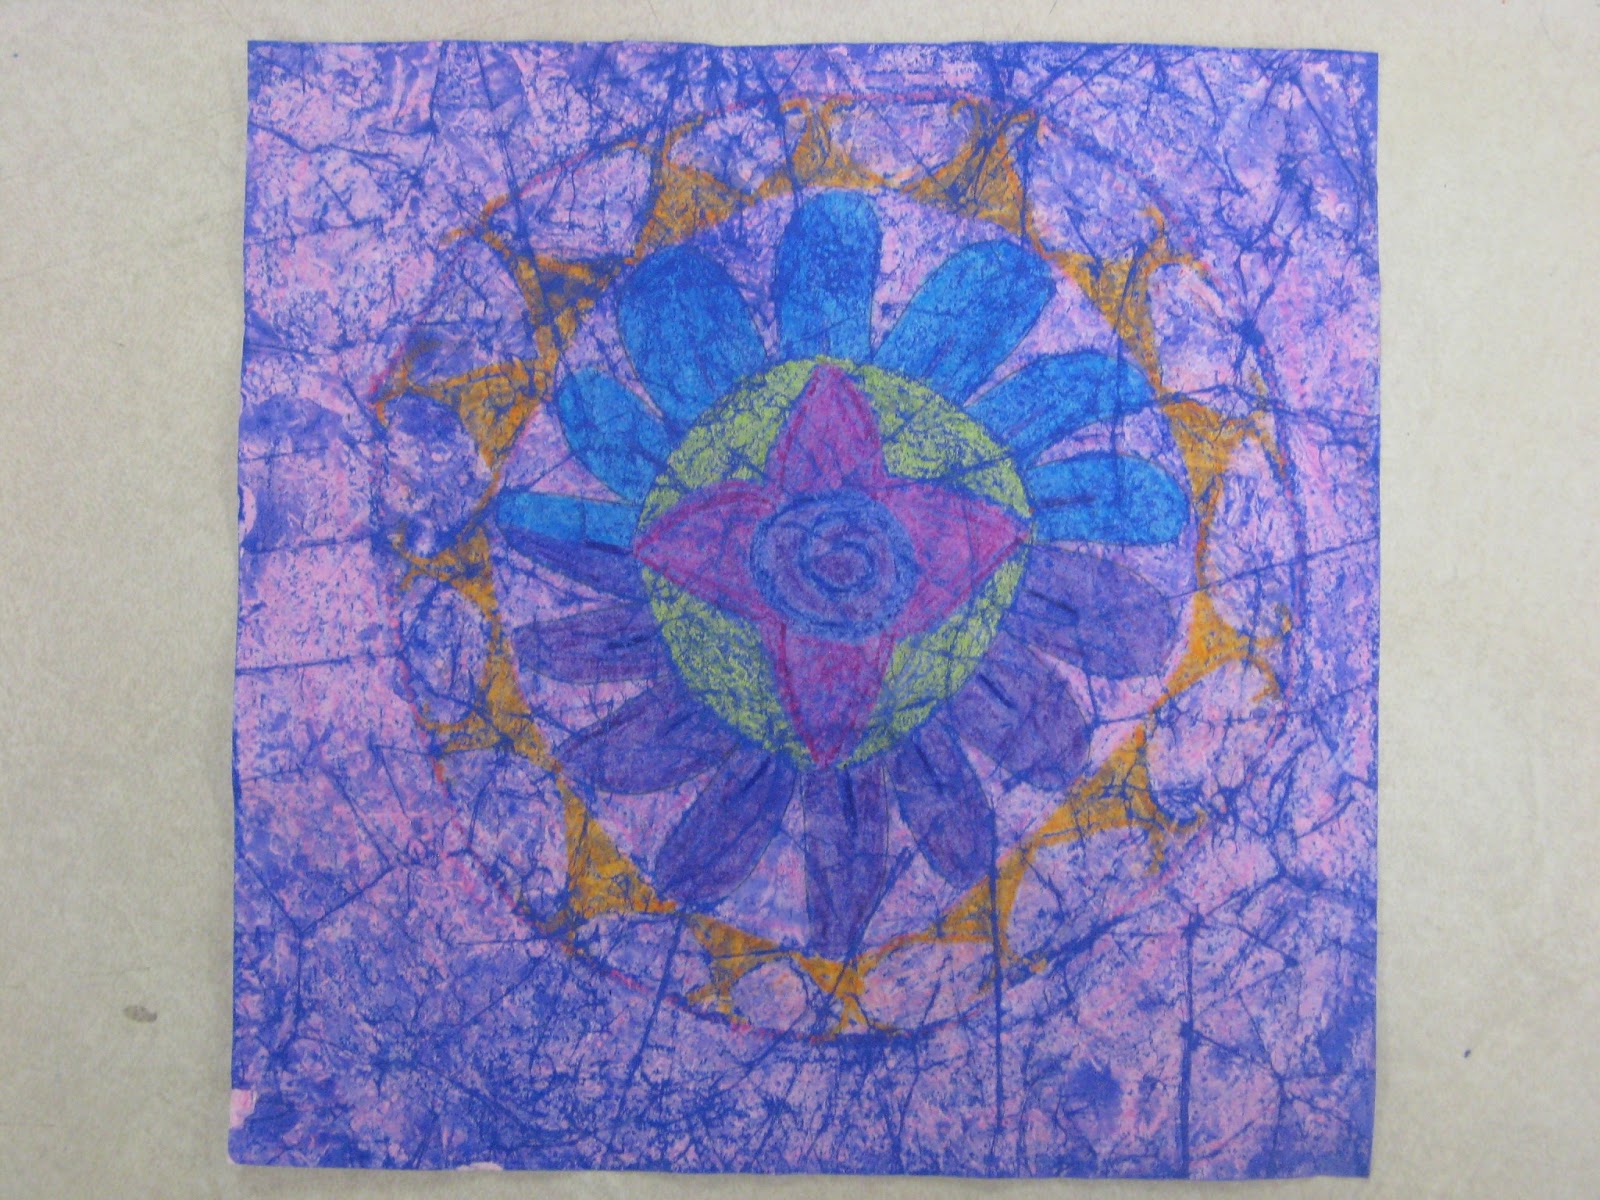
Due to a lower art budget this year than last year, I am now at a point in the year where I'm trying to find creative ways to use the remaining art supplies: mostly crayons and paper. With 5th grade, I decided to do batik mandalas. I am so happy with the results! This was a lesson where even significantly below average students understood the concept and did
well. We began by looking at some Indian mandala designs on fabric. We talked about the radial symmetry in the designs. Then, the students had to guess what the art was created on (paper? glass? etc.). Once a student said "fabric" I explained the process of batik, using wax on fabric and then dying it. Then, I told the students that we didn't have any fabric in my classroom but that there was a way we could make paper look like batik. I asked the students if they could think of any art supplies we have that are made of wax: most of the students immediately said crayons.
The students designed their own mandalas, looking at several examples I placed around the room (images of batik mandalas from India, examples of the project that I had made, and my "how to draw a mandala" posters from
this sub lesson). After the students had colored their whole paper with crayons (we used copy paper cut into an 8 1/2" x 8 1/2" square), we wrinkles the pictures up into a little ball, and squeezed them hard to make good deep wrinkles. This cracked the wax crayons. Then we painted "ink" over the whole thing, which was a 50/50 mix of tempera paint and water in their choice of a dark color (blue, green purple, or black). Lastly, the students dabbed the picture all over with paper towels, which left ink only in the cracks, or where they didn't color well enough. Great results, and very low budget! Paper was free, the students have their own crayons, and the amount if tempera paint used was very minimal.