Wednesday, September 19, 2012

Extra Time Activity/Sub Lesson

Sometimes (actually, pretty often!) I have one of those projects where half of the class is completely done, while the rest of the students still need another full class period to finish. It's times like that I need extra time activities that engage the students, that keep them busy, and are beneficial to their artistic skills and/or art knowledge.

This week, I had half of my 4th grade class finish something early that involved symmetry (more about it in a few days, once everyone's done!), so I pulled out some "draw the other half" worksheets I had created last month for emergency sub lessons. These are wonderful for sub lessons, because they're self explanatory, and they're great for early finishers because practicing your drawing skills and exercising the right side of the brain are things you can't get too much of.

The ones in the pictures below are photographs of half of a tiger face. I like these, because shading is required to get all of the values in the photograph. Some "draw the other half" worksheets provide a grid to help with placement of objects on the page, but I prefer with no grid. It gives a nicer finished product, if nothing else, but I think learning to use your fingers to measure distances, or just sighting on trial and error, are valuable skills.

The kids in the pictures below are in 4th grade.


Saturday, September 15, 2012

Artist of the Week

My school has a glass display case near the main entrance, and the administration has kindly let me use it for art displays. Every week on Friday, I pick an outstanding piece of student art, and hang it in the display case with a sign saying "Artist of the Week" above the art and the student's name below the art. It's really about as wonderful of a display case as I could ask for, because the back is cork covered in fabric, so I can pin pictures to it, and there are pegs for a glass shelf I can have temporarily installed when the art is 3D.

This week, my 6th graders just finished printmaking (with foam), and I was really impressed with this student's printing skills (below), so I picked his work. I love how the ink (Speedball water-based) is a little transparent, so the colors change slightly depending on what color paper they are being printed on. The blue on the left print and the middle print is the same; the yellow ink on the second print and fourth is the same; but each image has it's own beautiful hue.
It's going to take me some time to finish sorting and grading everyone in 6th grade's prints, since most students have 6 prints (three colors of ink each on two separate papers), but I will post more about this art project in a few days.


Tuesday, September 11, 2012

More Stained Glass Windows!

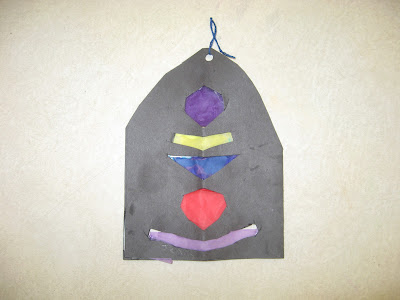
Last week, we had a 2 hour delay for fog, so one of my 1st grade classes didn't get done with their windows. Since many of the students only needed half of a class longer to finish, I gave them a stained glass coloring page to work on if they finished early. It ended up being a wonderful assessment of their learning, because I told them to color it symmetrically (we've been working on symmetry), and they did! With the tissue paper windows, they really had to make them symmetrical because of the way we cut them. (When you fold something in half and cut, it'll be symmetrical, whether or not you understand the concept!)

So here are a few more finished windows, and a few symmetrical coloring pages:


Friday, September 7, 2012

1st Grade Stained Glass Windows

My 1st graders are learning about symmetry. I have some images of beautiful stained glass windows with symmetrical designs to show the students. Last year, my classroom was not equipped with a projector and Promethean board until around January, so some of my images are transparencies that I used with an old overhead projector. My stained glass window pictures are transparencies, so I tried to find similar images online to show on my Promethean board, but I couldn't find any I liked as much.

So, I decided to give the old overhead projector a shot. The kids thought it was the coolest thing! They all gasped and "wow!"ed as I turned it on, and placed the transparency on the glass. They really seemed to think it was about the coolest thing I'd shown them all year!

After the excitement of the dinosaur age technology (why are kids always so much more impressed with old technology then the latest gadgets? I remember when I was in about 5th or 6th grade, I discovered my dad's old typewriter that worked with out electricity! I thought it was the coolest thing he had.), we made our own stained glass windows with black colored paper and colored tissue paper. The students learned that to make symmetrical windows, you fold the paper in half and cut both sides at once!

We added little strings so the students could hang them in a window of their house. Light comes through the tissue paper a little bit, kind of like real stained glass. The windows are the same on both sides, because there are two layers of black paper (it was folded like a greeting card), and the tissue paper is glued in the middle.

Below are a few pictures. I didn't get very many because I try to let the students take them home the same day that they make them.


Tuesday, September 4, 2012

4th Grade Insect Key Chains

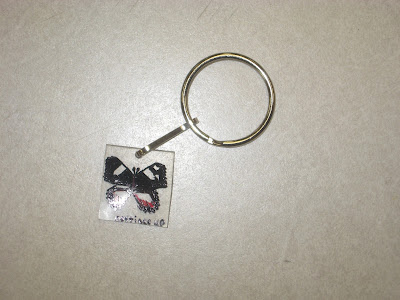
My 4th graders recently got to use shrink film, the kind of plastic that Shrinky Dinks are made out of. Of course coloring the pre-cut designs of Shrinky Dinks is more of a craft than an art, so my students drew their own designs :).

I began by telling the students that for the next art project, we would be drawing something that many of them might think is a little gross, slimy, creepy, and crawly. Naturally the boys erupted with excitement, and the girls complained briefly, until I mentioned that some insects are actually quite beautiful, and that when we see a butterfly or dragonfly, most people say, "oh, how pretty!", not, "ew, an insect!" 

After discussing the variety of pretty and scary insects, all of the students seemed content.

Next, we discussed ways to draw insects realistically. While many students were in favor of me bringing in live insects for them to observe, we settled on drawing from photographs.

Lastly, we discussed difficulties with drawing insects. One main difficulty would be the size; how can you draw something so small? That's when I introduced the shrink film to them, and told them we'd be drawing larger-than-life, and then shrinking it down to size.

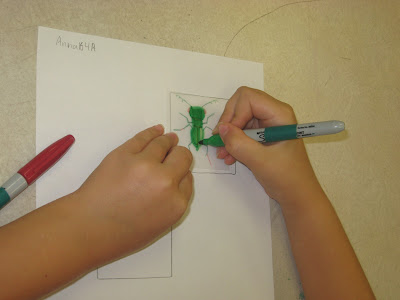
After I had explained the project, the students began working. They each got to select one photograph of an insect (I was sure to have a variety of pretty and creepy ones available!), and they drew it on plain white paper in a box. I had them trace little cardboard squares I'd cut to draw their insect in,  because I had cut the shrink film to 2 1/2" x 2 1/2", and their insect needed to fit on that size.

Once the students had a good insect drawing (many students drew multiple insects until they got one they really liked), they put a piece of shrink film over their drawing, and traced the whole design very carefully with Sharpie (I have sets with 32 different colors). If they had accidentally not centered their insect in the 2 1/2" x 2 1/2" box they drew on their paper, they could move the shrink film over so the insect was in the middle of that.

Once the students were done tracing their designs with Sharpie, I punched a hole in the shrink film, and the students would take turns getting to watch them shrink in my toaster oven. The kids love watching because they bubble up, and then they start to shrink and flatten out. The finished pieces were about 1" x 1", and much thicker.

After they were all shrunk, We added key chains to make them functional pieces of art. Below are pictures of the whole process, with the finished key chains at the end: